由于本文具有时效性,在此注明最后编辑日期,本文会不定期更新,但仅限我的blog,其它地方太麻烦了。 最后编辑于: 2023-12-23
建议
无论您是否需要此教程,都建议您向您的alist中注入以下代码,以规避不必要的责任
粘贴至设置-全局-自定义内容即可
1
2
| <script src="https://cdn.bootcss.com/sweetalert/2.1.0/sweetalert.min.js"></script>
<script>swal('注意','本站为私人云盘网站,如果您要下载内部文件,请注意:所有资源仅供学习交流使用,请在下载后24小时内删除','success'); </script>
|
安装
使用Docker
1
2
3
4
5
| docker run -d --restart=always -v /etc/alist:/opt/alist/data -p 5244:5244 -e PUID=0 -e PGID=0 -e UMASK=022 --name="alist" xhofe/alist:latest
docker exec -it alist ./alist admin random
docker exec -it alist ./alist admin set NEW_PASSWORD
|
(1Panel面板中有一键部署)
1Panel
一键脚本
如果你使用面板安装,先在面板创建一个网站,然后 cd 切换到网站目录
(仅适用于linux arm64/amd64平台)
1
| curl -fsSL "https://alist.nn.ci/v3.sh" | bash -s install
|
更新
1
| curl -fsSL "https://alist.nn.ci/v3.sh" | bash -s update
|
卸载
1
| curl -fsSL "https://alist.nn.ci/v3.sh" | bash -s uninstall
|
默认安装至opt/alist
自定义位置(将root替换为你想安装的位置)
1
2
3
4
5
6
| # 安装
curl -fsSL "https://alist.nn.ci/v3.sh" | bash -s install /root
# 更新
curl -fsSL "https://alist.nn.ci/v3.sh" | bash -s update /root
# 卸载
curl -fsSL "https://alist.nn.ci/v3.sh" | bash -s uninstall /root
|
- 启动:
systemctl start alist
- 关闭:
systemctl stop alist
- 状态:
systemctl status alist
- 重启:
systemctl restart alist
安装完成后访问
1
2
| # 执行 ifconfig 来获取YOURIP
http:
|
获取密码
需要进入脚本安装AList的目录文件夹內执行如下命令
低于v3.25.0版本
高于v3.25.0版本
3.25.0以上版本将密码改成加密方式存储的hash值,无法直接反算出密码,如果忘记了密码只能通过重新 随机生成 或者 手动设置
1
| # 随机生成一个密码./alist admin random# 手动设置一个密码,`NEW_PASSWORD`是指你需要设置的密码./alist admin set NEW_PASSWORD
|
警告
添加云盘后请及时配置[防盗/元信息]等措施,防止被[爬虫/其他人]恶意[访问/分享]导致帐号被[冻结/禁用]
—alist文档
反向代理
反向代理可以将5244端口监听至80/443端口,以此来部署SSL证书和不带端口访问。
本地代理
宝塔面板
宝塔
如果您一开始就使用面板安装,请跳过第一步。
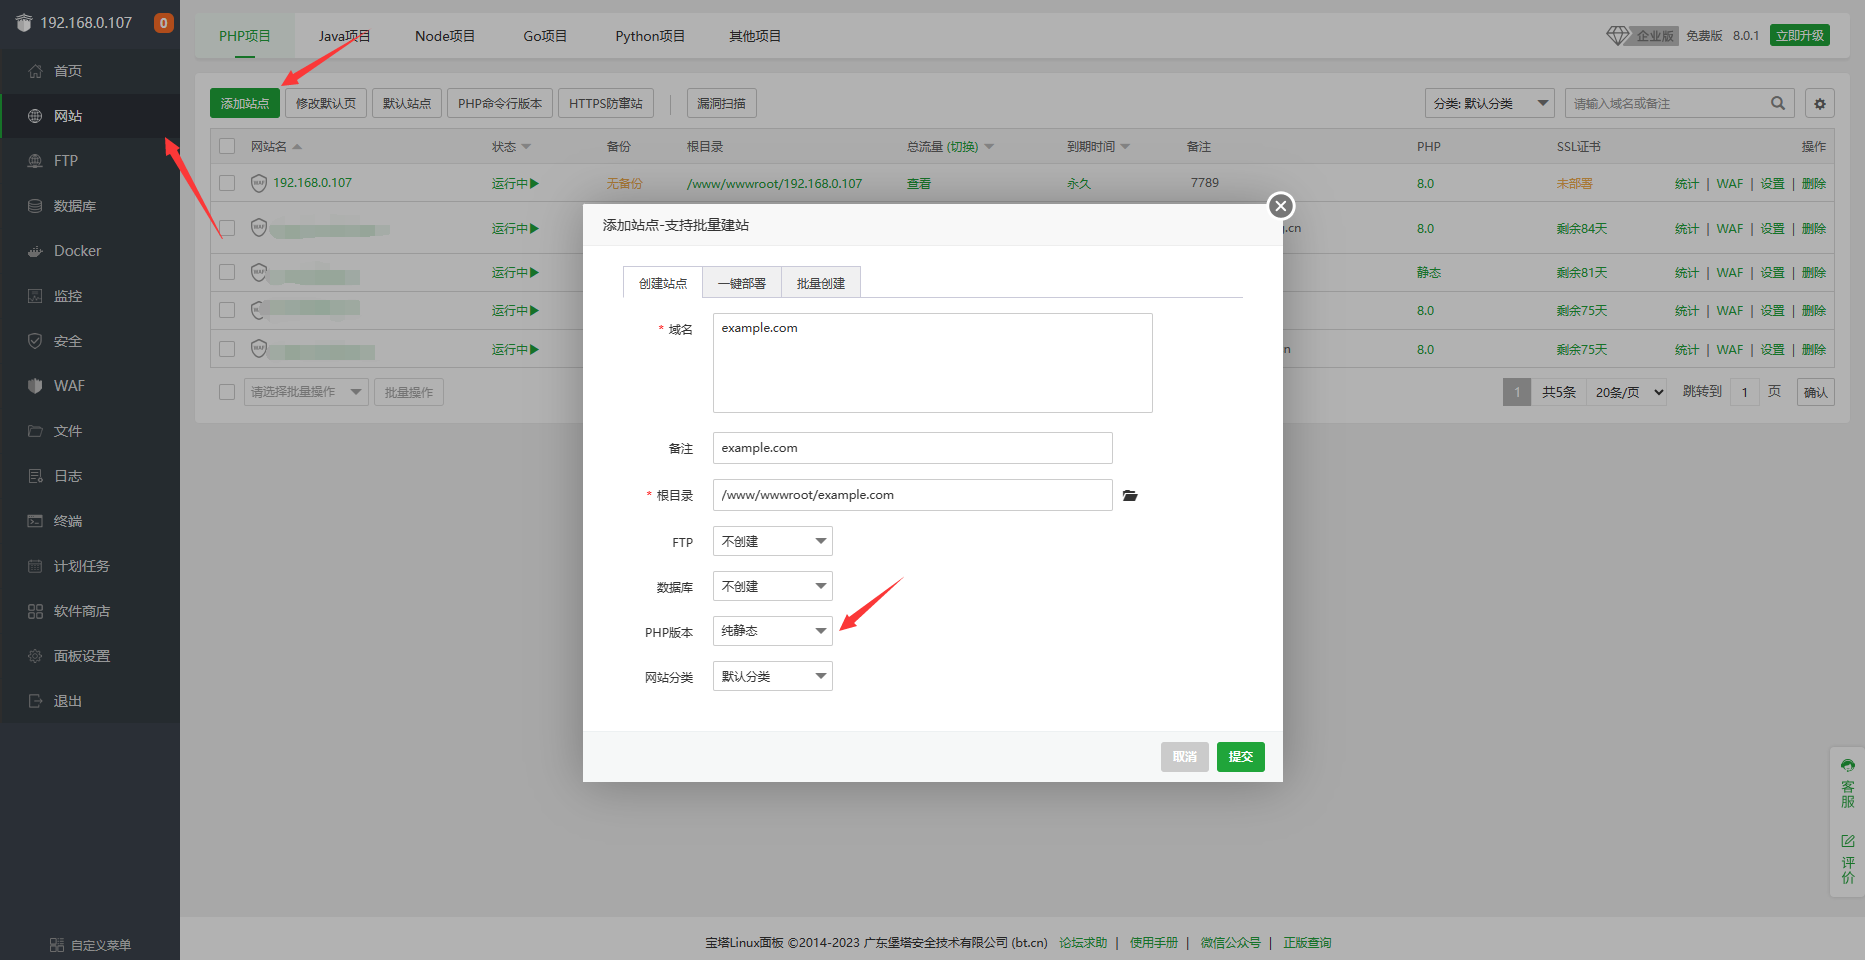
- 在宝塔的网站界面点击”添加站点”将php版本设置为纯静态,并将example.com替换为你的自定义域名
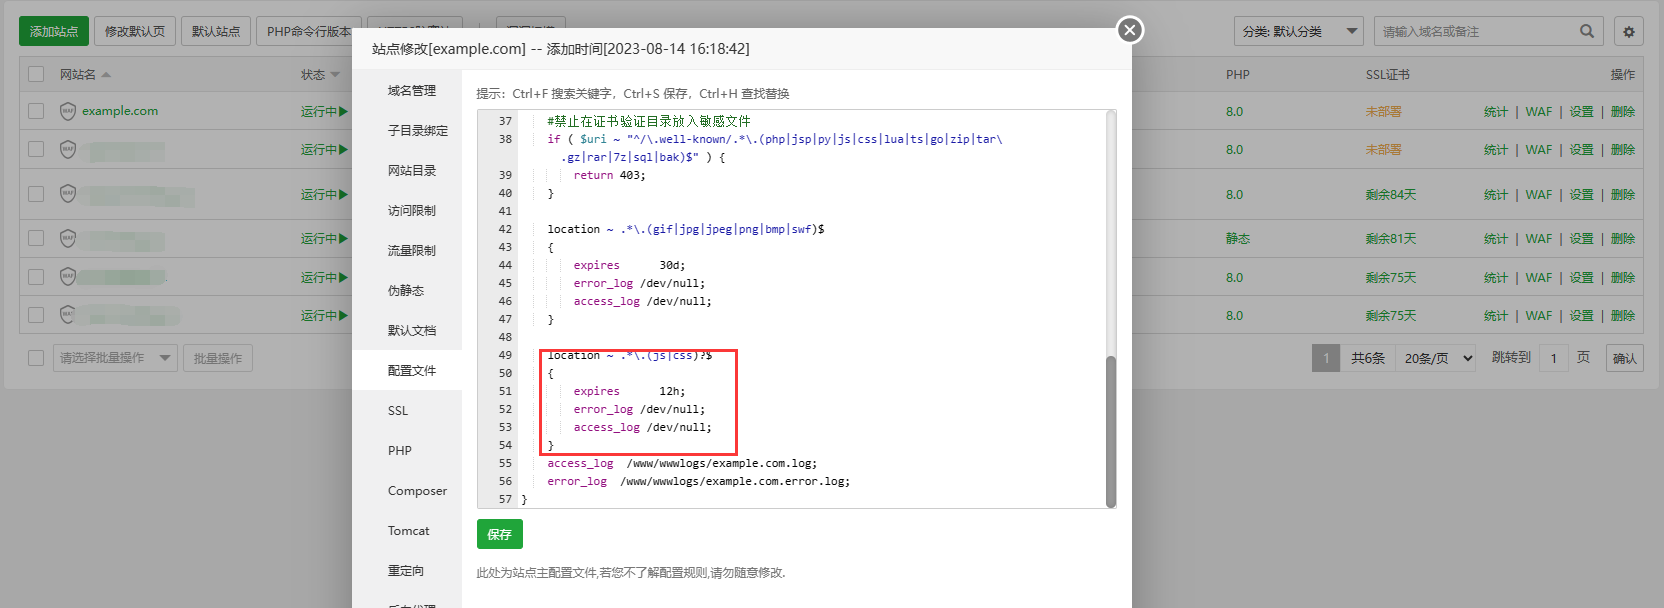
2. 点击设置-配置文件,删除图中框起来的几行,记得点保存

3.接着在配置文件中随便找个地方粘贴以下配置:(记得点保存)
1
2
3
4
5
6
7
8
9
10
11
12
| location / {
proxy_set_header X-Forwarded-For $proxy_add_x_forwarded_for;
proxy_set_header X-Forwarded-Proto $scheme;
proxy_set_header Host $http_host;
proxy_set_header X-Real-IP $remote_addr;
proxy_set_header Range $http_range;
proxy_set_header If-Range $http_if_range;
proxy_redirect off;
proxy_pass http://127.0.0.1:5244;
client_max_body_size 20000m;
}
|
4.添加A记录到你反向代理服务器的ip地址,使用内网穿透就A解析到内网穿透服务器ip或CNAME到内网穿透服务器域名
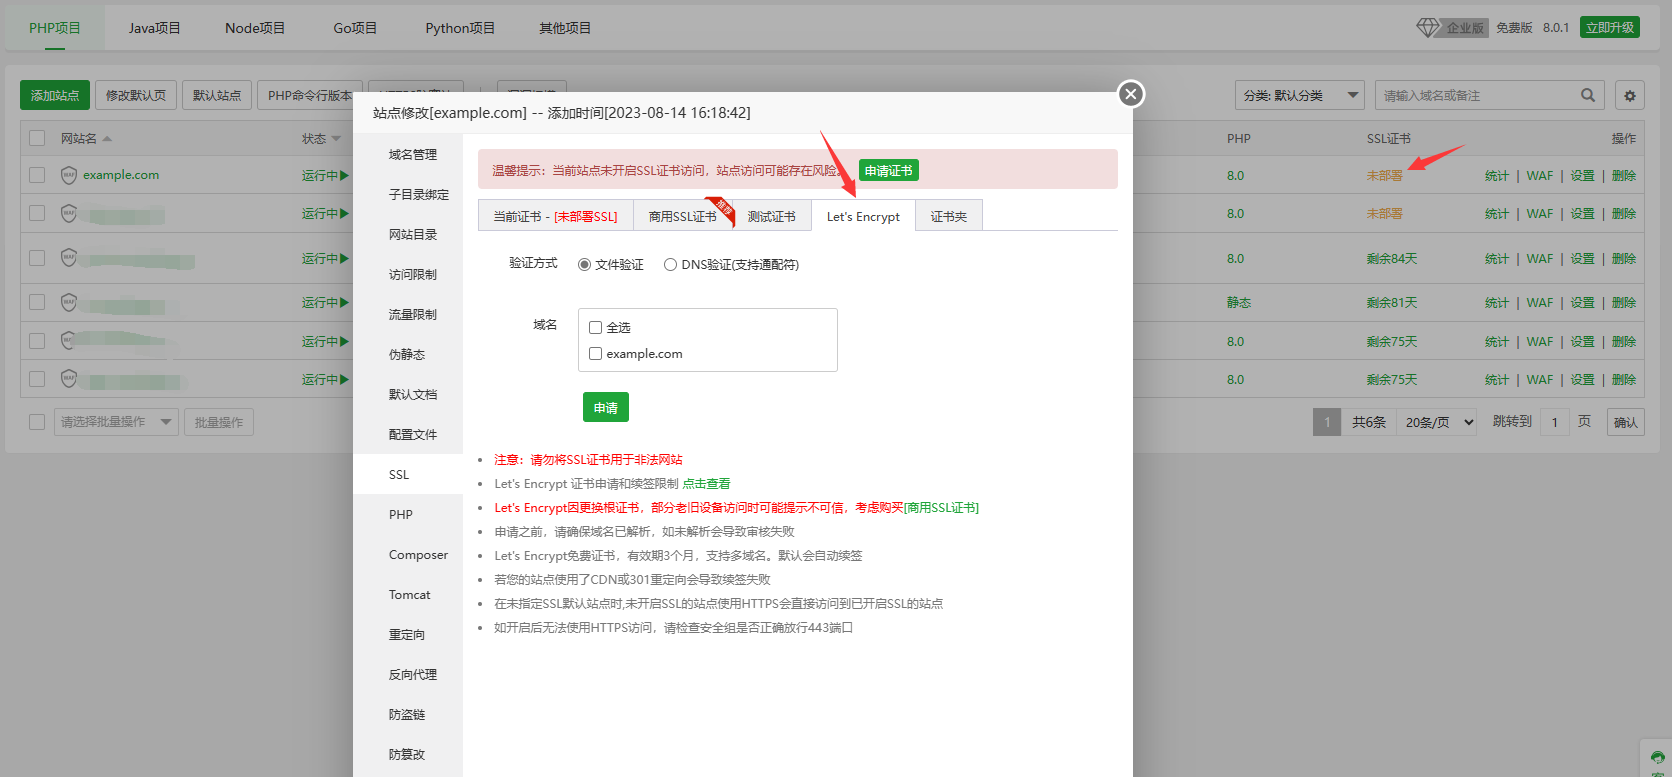
部署SSL
宝塔有一键部署,申请之后记得点保存,也可以使用阿里云或腾讯云的免费证书,用着更舒服
1panel面板
1.点击网站–创建网站–反向代理,在代理地址处填写127.0.0.1,主域名替换为你的自定义域名

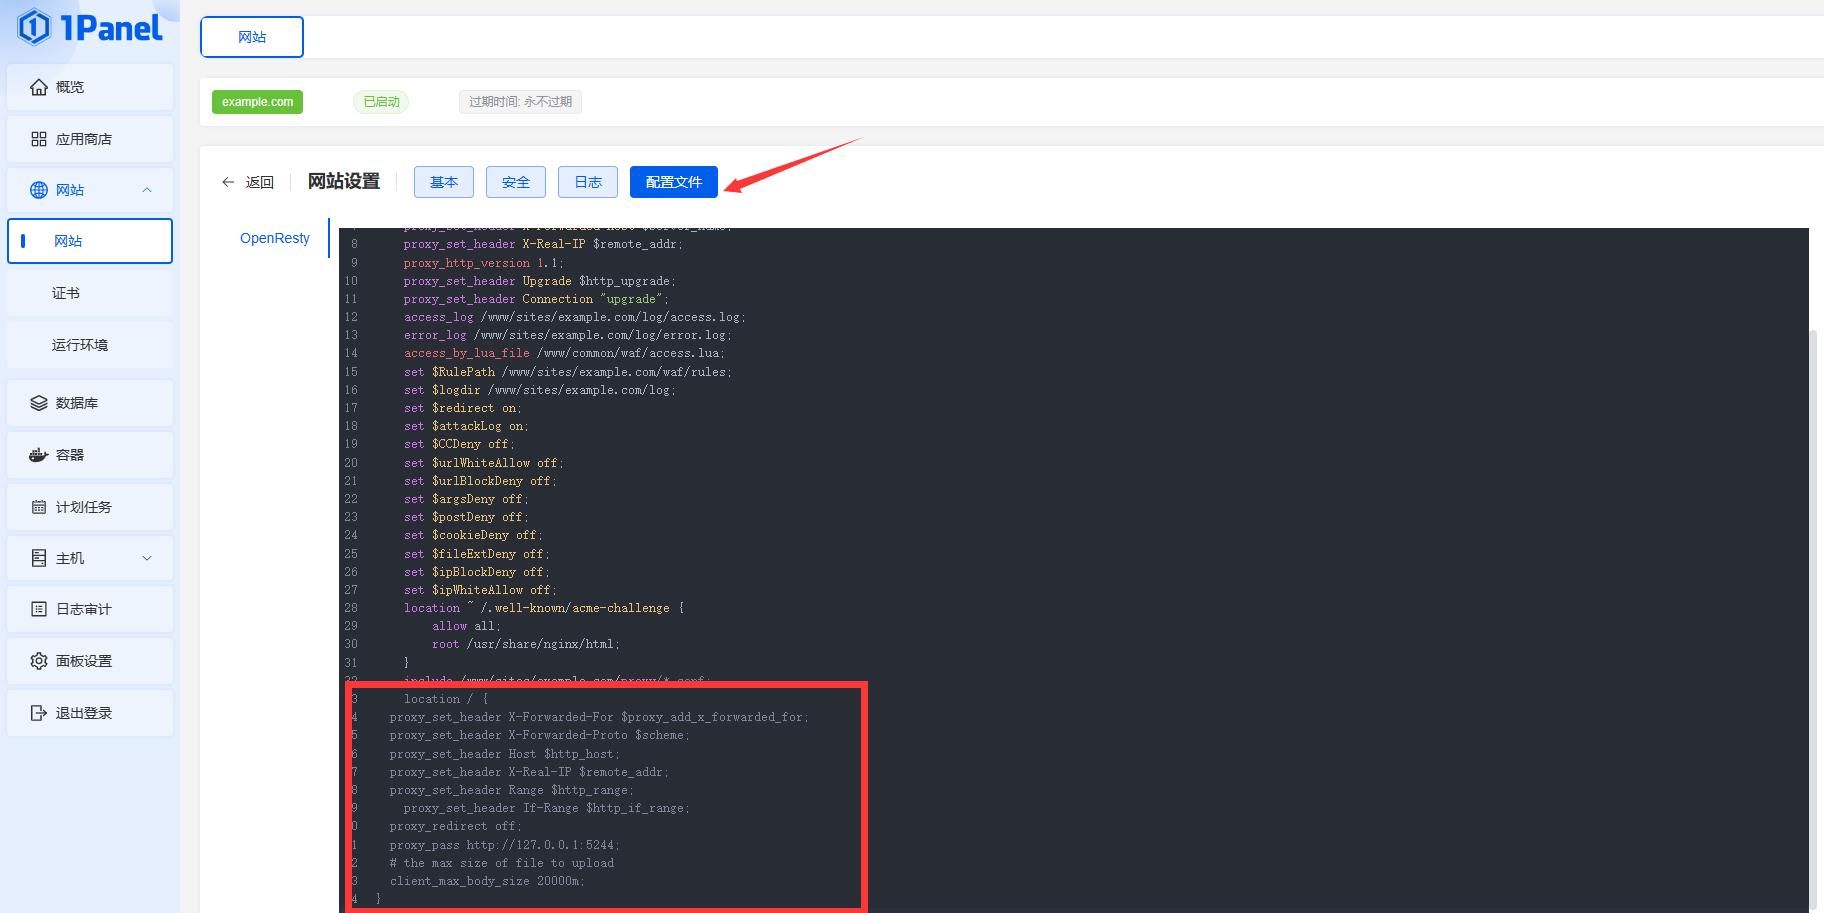
2.在反向代理网站点击配置–配置文件,在如图位置粘贴以下配置,注意不要放在最后面的那个右花括号后面
1
2
3
4
5
6
7
8
9
10
11
12
13
| location / {
proxy_set_header X-Forwarded-For $proxy_add_x_forwarded_for;
proxy_set_header X-Forwarded-Proto $scheme;
proxy_set_header Host $http_host;
proxy_set_header X-Real-IP $remote_addr;
proxy_set_header Range $http_range;
proxy_set_header If-Range $http_if_range;
proxy_redirect off;
proxy_pass http://127.0.0.1:5244;
client_max_body_size 20000m;
}
|
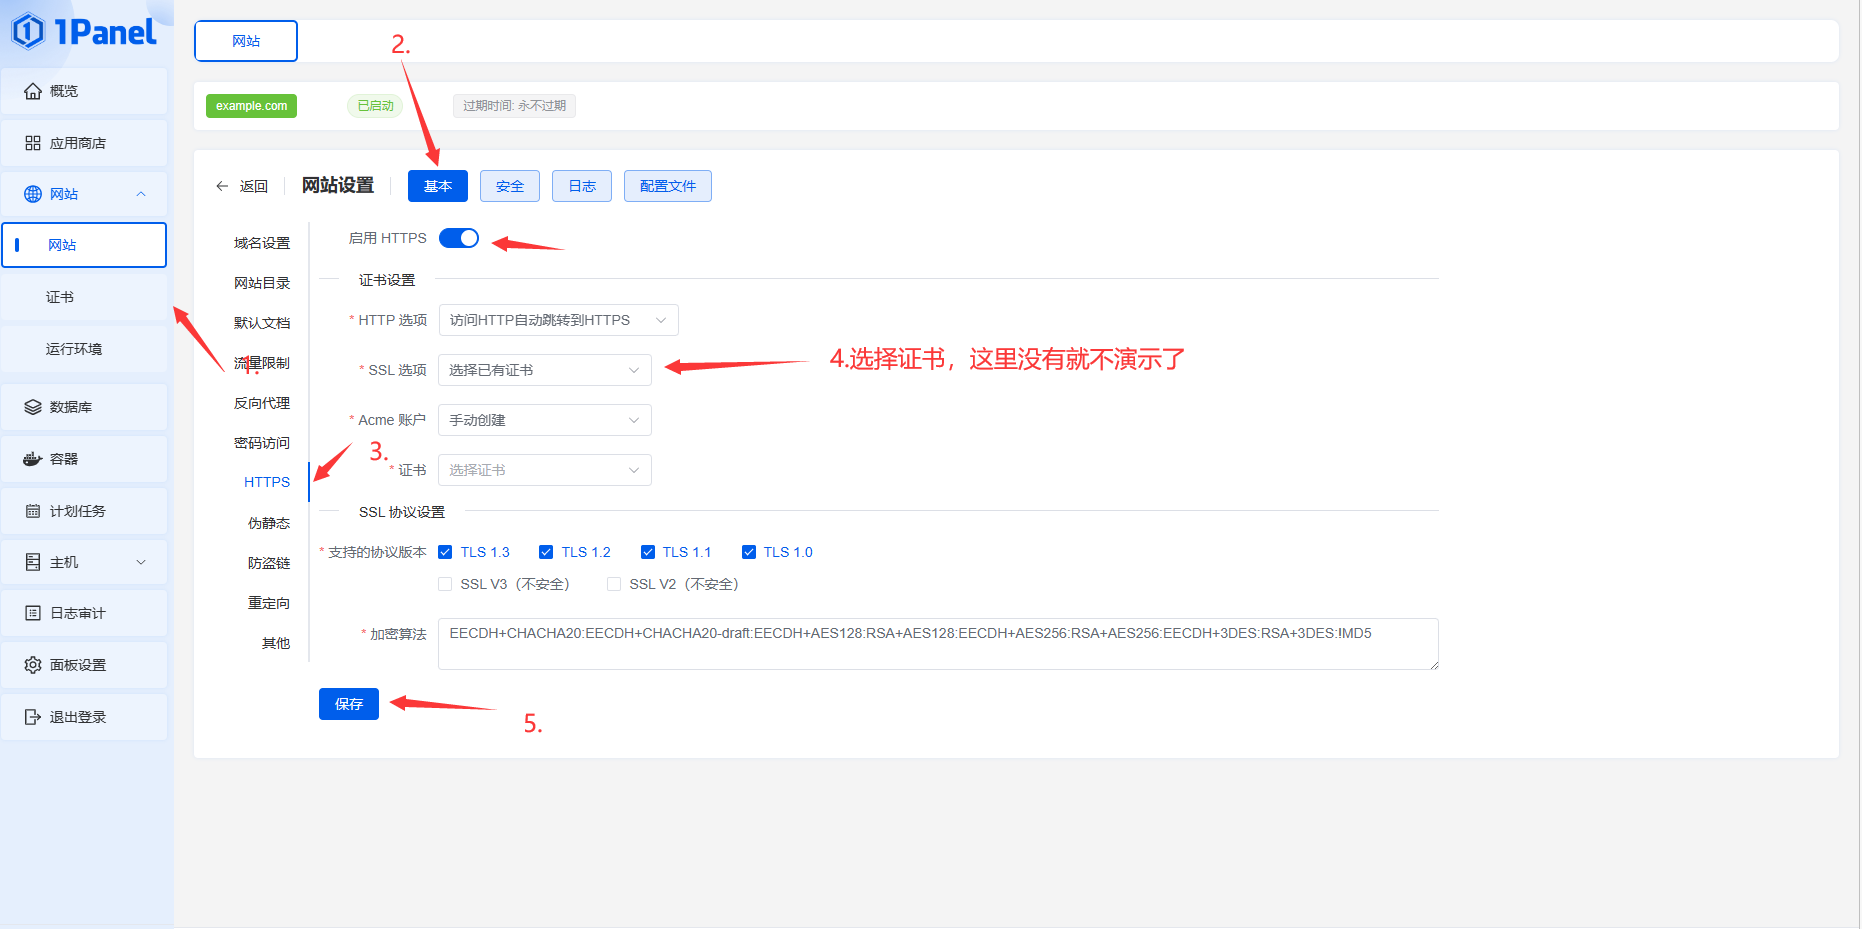
部署SSL
先在证书页面申请证书,然后如图操作
异地代理
只需要把上文需要添加添加的配置文件改为以下配置即可,把第9行的YOURIP改成你alist服务器的公网ip地址1panel记得把代理地址也改成你服务器的公网ip地址。
1
2
3
4
5
6
7
8
9
10
11
12
13
|
location / {
proxy_set_header X-Forwarded-For $proxy_add_x_forwarded_for;
proxy_set_header X-Forwarded-Proto $scheme;
proxy_set_header Host $http_host;
proxy_set_header X-Real-IP $remote_addr;
proxy_set_header Range $http_range;
proxy_set_header If-Range $http_if_range;
proxy_redirect off;
proxy_pass http://YOURIP:5244;
client_max_body_size 20000m;
}
|
服务器
可以用雨云,自己当网盘用完全没问题 雨云可以填优惠码:cat
雨云
如果使用内网穿透可以用樱花frp,界面好看免费额度还很多。
樱花frp